Cherry Jam: Only 3 Ingredients
Homemade cherry jam is one of summer’s delights. It’s easy to make, delicious and makes the most of in season cherries. This recipe uses the cherry pits for added flavour, but you can omit this step if you prefer. Spread it on toast for breakfast or enjoy with scones and cream for afternoon tea.
This post may contain affiliate links. As an Amazon Associate, I earn from qualifying purchases. See my cookie and privacy statement for further details.
For me, cherry jam is inexorably linked to Switzerland. As a teenager, I worked for a year in a small Swiss hotel. The owner had a cherry tree and made inordinate quantities of cherry jam. One of my daily tasks was to prepare and serve breakfast. It was always the same one: crusty rolls with butter and homemade cherry jam.
Surprisingly, it hasn’t put me off cherry jam, but it does transport me straight back to that little hotel in Montreux every time I eat it.
Dive Right In
- Why Make Cherry Jam?
- Homemade Cherry Jam
- How to Make Cherry Jam
- Top Tips
- Ways To Enjoy Cherry Jam
- Other Cherry Recipes You Might Like
- Keep In Touch
- The Recipe
Why Make Cherry Jam?
When I have a glut of fruit or spot a tray going cheap at the market, my first thought is to make jam. It’s a great way to preserve the season’s flavours, colours and nutrition. However, there are many other reasons why it’s a good idea to whip up a batch or three of homemade cherry jam.

- Cost-Effective – Buy fresh cherries in bulk during the peak season and turn them into jam. This is often more cost-effective than purchasing small jars of a decent cherry jam from the shops.
- Delicious Taste – It’s hard to resist that burst of intense sweet and fruity flavour when cherry jam first hits your tongue. It’s perfect for spreading on toast, scones or even pancakes and waffles. It’s also an incredibly useful ingredient for baking and a topping for various desserts.
- Homemade Goodness – When you make your own jam you have control over the ingredients you use. This ensures a high-quality and natural product. You’ll have a higher fruit to sugar ratio than commercial jams and can easily avoid any artificial preservatives and additives. And why not experiment with different cherry varieties to find out which one makes the best jam?
- Homemade Gifts – Give a jar of homemade cherry jam to friends, family or neighbours and brighten up their day. It makes for a thoughtful and delicious gift.
- Preserving Seasonal Bounty – If you’re lucky enough to have an abundance of fresh cherries during the cherry season, make jam. It’s an excellent way to preserve them. You can then enjoy the taste of cherries long after the season has passed.
- Sustainable Living – If you’re able to source local cherries you not only reduce food miles, but benefit the local economy too. And if you pot the jam into recycled and recyclable glass jars you’re onto a winner.
- Tradition – Jam making goes back a long way. Although it started as a means to preserve fruit, it’s also a fun activity to do with family and friends. I started to help my mother make jam as a child so I just defaulted to it when I got older. Why not start your own family tradition and pass your recipes on to future generations?
Homemade Cherry Jam
You can make jam with any type of cherry. I’ve made the one you can see here with sweet black cherries. I use less sugar in my cherry jam than most of the recipes you’ll find. After all, cherries are plenty sweet enough and less sugar is not only healthier, but it allows the flavour of the fruit to shine through.
It’s absolutely fine to use sour cherries though. In fact sour cherries make an even more delicious jam as they have a high acid content. They’re also softer skinned, so lose their shape and become more jammy when cooked.
Don’t worry about the sugar quantities if you use sour cherries though, you’ll just end up with a slightly tangier jam.
Whilst sour cherries contain a moderate amount of pectin, sweet cherries don’t have a great deal. This is easily sorted, however, by adding lemon. Lemon is a great source of natural pectin. Its tartness also balances out the sweetness of the cherries and sugar.
I use the whole lemon as well as the cherry pits. The lemon peel, pith and pips contain the highest amount of pectin, so it makes sense to use them. As for the cherry stones, they contain the seeds which are full of flavour – a mix of cherry and almond.
Once I’ve squeezed out the juice from the lemon, I place the remains in a muslin bag along with the cherry pits and cook it with the cherries. I then hoik the bag out before the final jamming stage.
Cherry pits and the inner nuts they contain are a potential source of cyanide. When you chew them they release a chemical called amygdalin, which your body converts into cyanide. Cooking the pits, however, deactivates the amygdalin and renders them safe to consume.
How To Make Cherry Jam
Once you’ve pitted the cherries, it takes very little time to make cherry jam. Just follow the easy steps below and you’ll have three jars of delicious tasting jam in no time.
Step 1. Before You Start
Before you start it’s a good idea to sterilise the jars and lids you’re going to store your jam in. Doing this helps to prevent any spoilage and extends the jam’s shelf life. You can see how to do it in this post: how to sterilise glass jars. I made three 250 ml (8.4 fl oz) jars with the quantities used in the recipe below.
You’ll also need a cold plate for testing whether the jam has set later on. If you have two, you can rotate them as you test, which makes the process even easier. I use two saucers.
Place them in the freezer so they get properly cold. The fridge works too, but the freezer is better.
Step 2. Prepare Cherries
Wash the cherries then transfer to a colander to drain. Remove both the stems and pits (stones). A cherry pitter* makes the latter job a whole lot easier. However, if you don’t have one, just halve the cherries and remove the pits with a sharp knife. Don’t throw them away though.
If you haven’t already done so, halve the cherries, then place them in a large heavy bottomed saucepan or preserving pan.
Squeeze the lemon juice into the pan, but retain the skin and pips.
Step 3. Tie Muslin (optional)
This step is optional, but highly recommended. Using the lemon skin and cherry stones helps to set the jam and add flavour respectively. Using a piece of string, tie the cherry pits, lemon skin and pips up in a square of clean muslin. I use a muslin bag with a drawstring*.
Drop the bag into the cherry pan.
Step 4. Cook Cherries
Over a medium heat, bring the cherries to the boil, then turn the heat down to a low simmer. Place a lid on the pan and cook gently for ten minutes or until the cherries are soft. Ensure the bag is submerged, if using.
Once cooked, turn off the heat. Fish out the muslin bag with a fork and squeeze it against the side of the pan to extract as much of the juice as possible.
Empty the contents of the bag into the compost bin and give it a quick rinse before dropping it into the laundry basket.
Add the sugar to the pan and stir until it’s dissolved.
Step 5. Make Jam
On a medium-high heat, bring the pan to a rolling boil. Boil until setting point is reached. This usually takes about ten minutes. You can tell when jam is nearly ready as it thickens and falls very slowly off a wooden spoon. It’s a good idea to start testing after eight minutes.
Alternatively, use a thermometer and boil until it reaches 105℃/220°F.
To test for set, remove the pan from the heat so it doesn’t overset. Place a teaspoon of jam on one of the cold saucers. Leave it for thirty seconds or so, then push your finger slowly through it. If it wrinkles, it’s set. If it remains runny with no wrinkles, continue boiling until you get there.
Step 6. Pot Up
Once the jam has reached setting point, give it a good stir, then ladle into warm sterilised jars. A jam funnel* makes this job a lot easier.
Cap immediately with clean sterilised lids and twist tight.
Leave to cool then label with the date and type of jam. Store in a cool dark place for up to a year, though it’s generally nicer when consumed in the first six months.
Once opened, store in the fridge where it should keep for three to four weeks.
Top Tips
For an additional flavour boost add a tablespoon of cherry brandy to the jam. Stir it in just before you pot it up.
If you double the recipe, it will take a bit longer for the jam to set, so don’t worry if it doesn’t look anywhere like setting in the first ten minutes. Just keep boiling until you reach setting point.
Beware of jam sugar, it has added pectin. You don’t need it for this recipe and you’ll likely end up with a very tough jam if you use it.
Jam keeps well, but it’s always at its best when freshly made. The flavour and colour just burst out.
Ways To Enjoy Cherry Jam
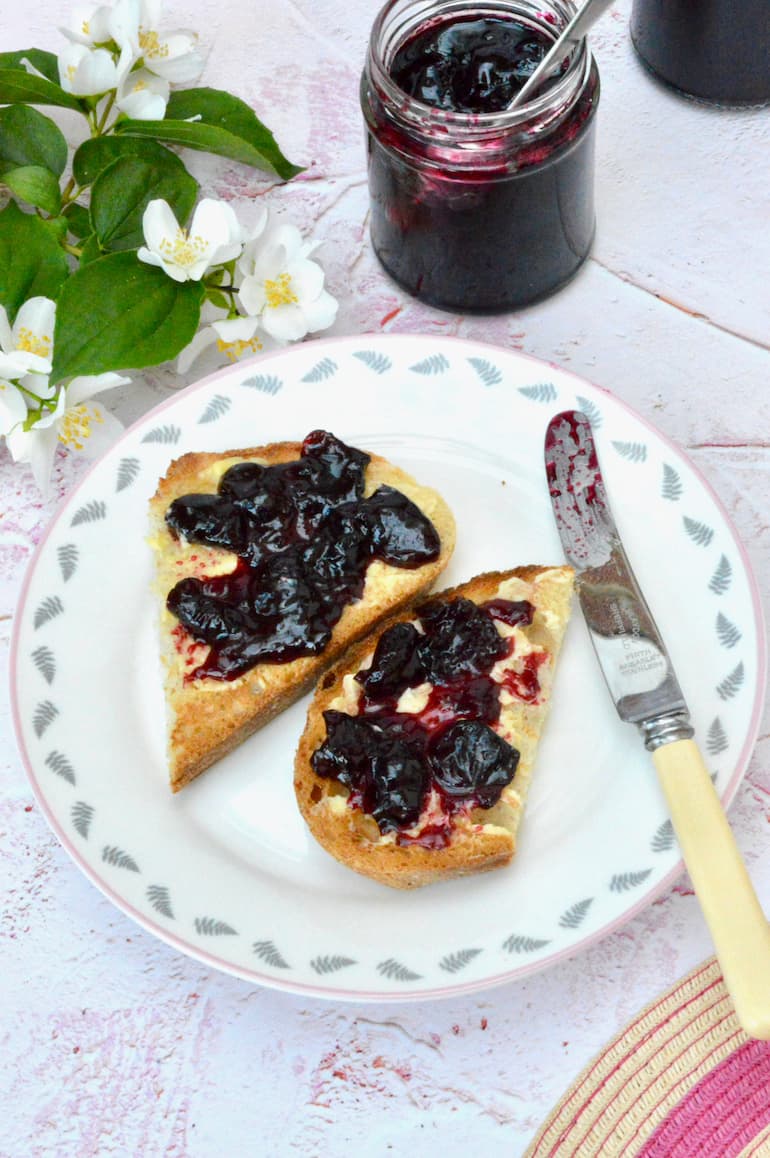
Cherry jam is delicious. As with most jams, I like it best spread on good bread or on toast with a bit of butter. However, it’s very versatile and you can use it to inject a fruity hit to all sorts of dishes. Here are a few suggestions:
Scones
Jam is the classic accompaniment to British scones. Either butter your halved scones and dollop the jam on top or serve it the proper Cornish way with cherry jam first and a scoop of clotted cream on top.
Try this cherry jam with these rich dark chocolate scones for a sort of black forest effect.
Yoghurt
Stir your cherry jam through yoghurt for a colourful swirl and a taste sensation. This is a great way to make a quick dessert when you’re in a hurry.
Baking
Cherry jam works for most cake recipes that call for jam as a filling. Try it in a classic Victoria sponge sandwich or this cheats version of a Bakewell cake. It’s also the perfect ingredient for biscuits (cookies) such as thumbprints , jammy dodgers and these chocolate viennese whirls.
Jam has a special affinity for pastry. Just think of those stolen jam tarts baked by the Queen of Hearts. Bakewell tarts and jam turnovers are two more traditional British bakes that spring to mind.
Dessert Topping
A swirl of cherry jam works wonders as a no-fuss topping for both pancakes and waffles. Or try some with either vanilla or chocolate ice cream.
Milk puddings such as semolina and baked rice pudding are both old-school and somewhat controversial. But if you do make them, serve them with a spoonful of jam on top. You won’t regret it.
And then there’s cheesecake. Cherry jam makes a perfect topping for a delicious homemade cheesecake.
Cheese
Instead of serving cheese with chutney, why not try it with cherry jam instead? The sweet and salty notes complement each other. Soft cheeses with a pronounced flavour work particularly well. Go for ripe brie, camembert, creamy goat’s cheese, gorgonzola and similar.
Other Cherry Recipes You Might Like
- Berry & rose kefir smoothie
- Black forest clafoutis
- Black forest trifle
- Cherry granola breakfast pots
- Easy pickled cherries
- Very cherry cream dessert
Keep in Touch
Thank you for visiting Tin and Thyme. If you make this cherry jam, I’d love to hear about it in the comments below. Do you have any recommendations or advice for jam making?
Please rate the recipe. If you post pictures of your creations on social media, use the hashtag #tinandthyme so I can see them.
For more delicious and nutritious recipes follow me on Twitter, Facebook, Instagram, Flipboard or Pinterest. And don’t forget to SUBSCRIBE to my weekly newsletter. Or why not join the conversation in our Healthy Vegetarian Whole Food Recipes Facebook Group?
If you’d like more jam recipes, follow the link and you’ll find I have quite a lot of them. All delicious and nutritious, of course.
Choclette x
Cherry Jam. PIN IT.
Cherry Jam: Only 3 Ingredients
Equipment
- cherry pitter (affiliate link) optional
- muslin cloth (affiliate link) optional
Ingredients
- 600 g fresh cherries whole weight, ie not yet pitted
- 1 lemon
- 360 g granulated sugar can use preserving sugar instead, but NOT jam sugar (I use golden granulated sugar)
Instructions
- Place two saucers or small plates in the freezer. You'll need these later for testing if the jam has set. Wash your jars and place in the oven to sterilise. For details check this post how to sterilise glass jars and bottles.
- Wash the cherries, transfer to a colander to drain, then remove the stems and pits (stones). Halve the cherries, then place in a large heavy bottomed pan or preserving pan. If you don’t have a cherry pitter, halve the cherries first, then remove the pits. Don’t throw those pits away though.600 g fresh cherries
- Squeeze the lemon juice over the cherries, but retain the skin and pips.1 lemon
- Tie the cherry pits, lemon skin and pips up in a square of muslin or use a muslin bag. Add this to the cherry pan.
- Over a medium heat, bring the cherries to a low simmer. With a lid on, cook for ten minutes or until the cherries are soft.
- Fish out the muslin bag with a fork and squeeze it against the side of the pan to extract as much of the juice as possible.
- Add the sugar to the pan and stir until it’s dissolved.360 g granulated sugar
- On a medium-high heat, bring the pan to a rolling boil. Boil until setting point is reached. This usually takes about ten minutes. Start to test after eight minutes though.
- To test, remove the pan from the heat so it doesn’t overset. Place a teaspoon of jam on one of the cold saucers. Leave it for thirty seconds or so, then push your finger slowly through it. If it wrinkles, it’s set. If it remains runny with no wrinkles, continue boiling until you get there. Alternatively, use a thermometer and boil until it reaches 105℃/220°F.
- Once the jam has reached setting point, give it a good stir, then ladle into warm sterilised jars. A jam funnel makes this job a lot easier. Cap immediately with clean sterilised lids and twist tight.
- Leave to cool then label with the date and type of jam. Store in a cool dark place for up to a year, though it's generally nicer when consumed in the first six months.
Notes
Nutrition Estimate
This post contains affiliate links which are marked with an asterisk* or (affiliate link). If you buy through a link, it won’t cost you any more, but I might get a small commission. Thank you for your support of the brands and organisations that help to keep Tin and Thyme blithe and blogging.
This cherry jam is incredible! I love serving it on top of cheesecakes or just on a piece of toast! Absolutely love it!
On toast for me, but cherry jam does indeed work well with cheesecakes too.
I Iove the simplicity of this recipe and the jam is just perfect on biscuits. 🙂
Simple single fruit jams are my favourite. The flavours really shine.
Cherry Jam – one of my special favourites. Roll on cherry time, that’s really Christmas. :))
Even though I spent one Christmas in NZ and we strolled around in the sun eating ice cream, I still can’t really get my head around the change of seasons. Cherries in December sounds strange.