Plum Jam: Variations On A Theme
Plum jam is one of the easiest jams to make at home. It’s also delicious. Plums contain plenty of pectin which is the substance you need for the jam to set. Only two simple ingredients required for this recipe, three if you include water.
This post may contain affiliate links. As an Amazon Associate, I earn from qualifying purchases. See my cookie and privacy statement for further details.
Homemade jam is a glorious thing and plum jam is no exception. It’s one of my favourite jams to make as it sets so easily and tastes so good. And all you need to make it are plums, sugar and water.
Making jam is a great way to use up an excess of homegrown plums or cheap ones when they’re in season. You can then enjoy the fruit during the winter months when summer seems like a distant memory.
Use any type of plum or gage you like, I’ve made Victoria plum jam, this golden plum jam and purple plum jam. Greengage jam is delicious, but I’ve never been fortunate enough to get my hands on enough greengages to make any.

As is the case with many of my recipes, I use a little less sugar than most. The jam is, however, still perfectly sweet, sets easily and stores well.
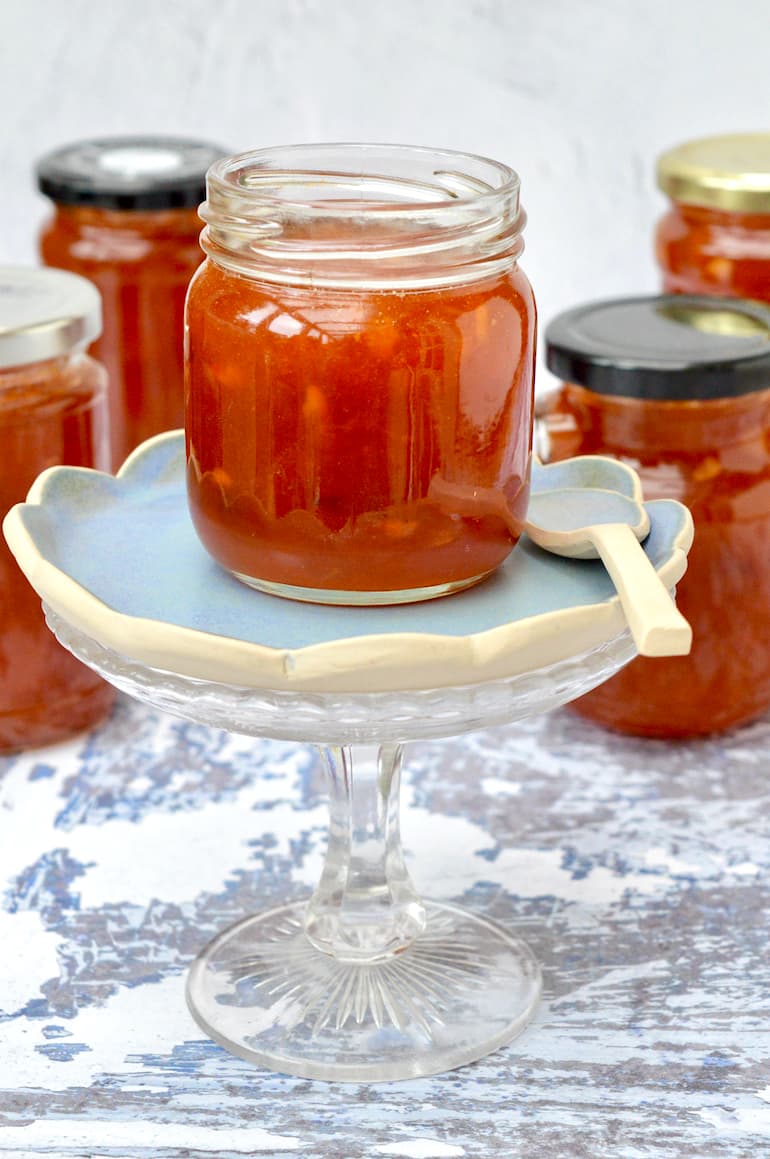
The quantities I’ve given in the recipe card is for one kilo of plums which makes approximately six small (250ml / 8.5 oz) jars.
How To Make Plum Jam
You can make this easy plum jam in two simple stages. The whole thing should be done within forty minutes, forty five at the most.
Before you start with the jam, place two saucers in the freezer. You’ll need these later to test for when the jam is set. See the section on how to do this a little further down the post.
Stage One
You’ll need a large wide stainless steel saucepan to make jam in. The jam can rise quite high when cooking and you really don’t want it boiling over. It will also come to setting point faster in a wider pan. A preserving pan* is ideal if you have one. I don’t.
Don’t use aluminium, copper or iron pans. They’ll react with the acid in the fruit and taint the finished jam.
Halve the plums and take the stones out. Thankfully there’s no need to get rid of the skins.
Simmer the plums in the water, uncovered, until the fruit has broken down and the skins are soft. This will take between ten and twenty minutes, depending on how firm your plums are.
Turn off the heat and add the sugar. Stir until all of the crystals have dissolved.
See the section plum jam variations for how to make plum kernel jam for additional flavour and texture.
Whilst the plums are cooking, wash and sterilise your jars. If you’re not sure how to do this, I have a whole post on how to sterilise glass jars and lids.
Stage Two
Place the pan back on the hob over a medium high heat and bring the plums to a rolling boil. Boil for five minutes then take the pan off the heat and test to see if the jam has set. If not return to the heat and continue to boil for a further two minutes.
Keep testing until the jam has reached setting point.
Remove any scum from the surface with a slotted spoon and leave the jam to settle for five minutes. Give it a good stir, then ladle into your hot sterilised jars. A jam funnel* makes this process easier and less messy. I use a stainless steel ladle* and funnel which I sterilise in the oven along with the jars.
Screw the sterilised lids on immediately as tight as you can. This is usually enough to create a good seal. Leave the jars to cool before storing.
Don’t forget to label the jars with the date and type of jam. I’m not very good at this bit and always end up having a guessing game as to what’s in my jars.
Top Tips
If you double the recipe, it will take a bit longer for the jam to set, so don’t worry if it doesn’t look anywhere like setting in the first five minutes. Just keep boiling until you reach setting point.
You shouldn’t need to stir the jam whilst it’s boiling. But if you feel the need to check the fruit isn’t catching on the bottom of the pan, use a long handled wooden spoon. This is to prevent getting burnt by hot splashes. And metal spoons will get hot very quickly and may burn your hand.
How To Tell When Jam Is Set
To test for setting point, use the wrinkle test. Remove the pan from the heat after it’s boiled for five minutes. Place half a teaspoon of the plum liquid onto a cold plate. Leave for thirty seconds, then push your finger up against the jam.
If it wrinkles it’s set. If it’s still runny, it’s not. Boil the jam for two more minutes and test again. Repeat until the jam is set.
Before you start to make the jam, place a couple of saucers in the fridge or freezer. Use these to test if your jam is set.
Alternatively you can use a thermometer. As soon as the temperature reaches 105℃/220°F, it should be set. I’ve never used a thermometer, however, as the wrinkle test is simple and it works well for me.
How To Use Plum Jam
Like any good jam, plum jam is at its best just simply spread on bread or toast with butter. It’s also a must for most scones, not forgetting the all important clotted cream, of course.
However, jam lends itself to all sorts of puddings, desserts and bakes. I can’t have a bowl of rice pudding or semolina without a blob of jam on it. And it really turns a bowl of porridge into a breakfast treat.
My mother, who was the queen of puddings, used to make a jam and meringue confection called Queen Of Puddings. And there are so many other classics, just think jam roly poly or even the humble jam tart.
Although raspberry jam is the classic filling for a Victoria sandwich cake, plum jam works well too. These jammy flapjacks, jam almond cake and jam doughnut muffins are three more recipes where you can put your plum jam to good use.
Plum Jam Variations
Plum Kernel Jam
Adding plum kernels to the jam gives a subtle almond flavour and a nice crunch. You’ll see I’ve used them in the jam I made for the images in this post.
Using nut crackers, take the kernels out of some of the plum stones. You can either leave the skins on or remove them. To remove, place them in a small bowl and cover with hot water. Leave for a minute or two. You can then rub the skins off easily with your fingers.
Cook the kernels along with the fruit at the beginning of the process.
Plum And Lime Jam
Grate in the zest of a lime and add the juice at the same time as the sugar.
Plum And Orange Jam
Grate in the zest of an orange and add the juice at the same time as the sugar.
Spicy Plum Jam
Add a cinnamon stick or a star anise and remove just before jarring up.
Damson Jam
See my recipe for damson jam.
FAQs
All plums make good jam. Some will be more flavourful than others, some will take longer to cook and they’ll all produce a different colour and flavour preserve. Victoria plums are particularly good for taste as are greengages and damsons. Red skinned, purple skinned, golden skinned, mirabelle plums and bullaces are all good to go though.
Plums are high in pectin, so plum jam is a particularly easy one to make.
No definitely not. The skins not only add colour and flavour, but they also contain a lot of the pectin you need to get the jam to set.
It’s best to remove the stones from the plums before you start cooking them. To do this, halve the plums around the natural indentation, twist the halves apart and remove the stones with the tip of a sharp knife.
However, with damsons, bullaces and other small plums this can be a bit fiddly. In theory you can cook the whole fruit and remove the stones after cooking. They should float to the top by the time setting point is reached. You can then use a slotted spoon to remove the stones along with any scum.
If you don’t have fresh plums, it’s fine to use frozen ones. It’s best to stone the plums before freezing, you can then just add them to the pan without having to defrost them first.
Granulated sugar is a good one to use for jam. Large crystals allow the sugar to dissolve more easily. If you can get preserving sugar so much the better, but do not use jam sugar or any other type that has added pectin. You don’t need it.
Unopened jars of homemade jam will keep for at least a year, though they’re usually at their best in the first six months. Make sure they’re well sealed in sterilised jars, then store in a cool dark place. Once opened, store in the fridge and eat within two months.
Other Jam Recipes You Might Like
- Blackcurrant jam
- Chocolate blackberry jam
- Fig, apple & pomegranate jam
- Gooseberry jam with optional elderflower
- Strawberry jam
- Vanilla apricot jam
Keep in Touch
Thanks for visiting Tin and Thyme. If you make this easy plum jam, I’d love to hear about it in the comments below. And do please rate the recipe. Have you any top tips? Do share photos on social media too and use the hashtag #tinandthyme, so I can spot them.
For more delicious and nutritious recipes follow me on Twitter, Facebook, Instagram, Flipboard or Pinterest. And don’t forget to SUBSCRIBE to my weekly newsletter. Or why not join the conversation in our Healthy Vegetarian Whole Food Recipes Facebook Group?
If you’d like more plum recipes, follow the link and you’ll find I have quite a lot of them. All delicious and nutritious, of course.
Choclette x
2 Ingredient Plum Jam. PIN IT.
Plum Jam
Equipment
Ingredients
- 1 kilo plums halved and stoned
- 300 ml water
- 900 g granulated sugar can use preserving sugar instead, but NOT jam sugar
Instructions
- Before you start with the jam, place two saucers in the freezer. You'll need these to test for when the jam is set.
- In a large wide stainless steel saucepan, simmer the plums in the water until soft and broken down. Don't use a lid. It will take somewhere between 10-20 minutes depending on how firm the plums are and how thick the skins.1 kilo plums, 300 ml water
- Whilst the plums are cooking, wash your jars and place in the oven to sterilise. For details check this post how to sterilise glass jars and bottles.
- Take the plums off the heat and pour in the sugar. Stir until the sugar is completely dissolved.900 g granulated sugar
- Crank up the heat and bring the plums to a rolling boil. Boil until setting point is reached. This usually takes between five to ten minutes. Start to test after five minutes.
- Remove from the heat. If any scum has formed on the top, scoop it off with a slotted spoon and discard. Let rest for five minutes, then stir.
- Using a ladle and jam funnel, pour into warm sterilised jars. Cap immediately with clean sterilised lids and twist tight.
- Leave to cool then label with the date and type of jam.
Notes
Prep Time
Prep time will very much depend on how many plums you have to prepare. For the purposes of this recipe, I’m assuming the plums are already halved and stoned.Plum Kernel Jam
Remove kernels from some of the plum stones. You can either leave the skins on or remove them. To remove, place them in a small bowl and cover with hot water. Leave for a minute or two. You can then rub the skins off easily with your fingers.Add to the cooking pot along with the plums.Wrinkle Test
To test for setting point use the wrinkle test. Remove the pan from the heat after it’s boiled for five minutes. Place half a teaspoon of the jam onto a cold plate. Leave for thirty seconds, then push your finger up against the jam. If it wrinkles it’s set. If it’s still runny, it’s not. Boil the jam for two more minutes and test again. Repeat until the jam is set.Double The Recipe
If you double the recipe, it will take a bit longer for the jam to set, so don’t worry if it doesn’t look anywhere like setting in the first five minutes. Just keep boiling until you reach setting point.How Long Will It Last?
Plum jam is at its best in the first six months, but it should last for up to a year if you keep it in a cool dark place. Once you’ve opened the jar, however, it’s best to keep it in the fridge.Please note: calories and other nutritional information are per jar. They’re approximate and will depend on exact ingredients used.Nutrition Estimate
Sharing
I’m sharing this recipe for two ingredient plum jam with The Rare Welsh Bit for #CookBlogShare.
This post contains affiliate links which are marked with an asterisk* or (affiliate link). If you buy through a link, it won’t cost you any more, but I might get a small commission. Thank you for your support of the brands and organisations that help to keep Tin and Thyme blithe and blogging.
Wondering why no water bath is required? All the other plum recipes I’ve found require a water bath. I made this tonight and although they’re still cooking I’m sure it will turn out great. Genuinely curious about the water bath part though and just letting them seal themselves
Hi Ashley. You don’t need a water bath for jam. There should be enough sugar in it to preserve it. I just opened a plum jam jar from last year and it’s absolutely fine. I think it might be an American thing, though I’m not sure why. Maybe because it’s hotter????? It’s not something we do in the UK for jam. The main thing to remember is to use sterilised jars and lids. Hope you enjoy it.
really simple recipe. I had a glut of plums from a Lidl veg box that needed using up. Thanks
Glad you found it helpful Sam and thanks for letting us know. Plum jam is one of the easiest to make, so always a favourite with me.
I love how easy this jam recipe is! And it’s way better than store-bought! Yum!
Thank you Rachel. I agree, heaps better than commercial jam. Glad you liked it and thanks for letting me know.
this plum jam was so simple to make and soooo good! perfect for a delicious breakfast spread!
Yay! So glad you enjoyed it and thanks for letting me know. What type of plums did you use?
A great way to use up extra plums! Super delicious and easy to make.
Absolutely. It’s one of the easiest jams to make. Great for beginners.
The plums are delicious this year. Jam is the perfect way to use them. I love that this recipe is so uncomplicated. It’s perfect! xx
It seems to be a good year for fruit all round. Simple recipes that you can jazz up if you feel like it are the best.
I just made a batch with foraged plums :-)) Homemade tastes the freshest and best.
How lovely Angie. I haven’t managed to find any wild plums around here. Luckily CT usually manages to pick me a bag from work.