Damson Jam (Easiest Method)
Damson jam is the queen of plum jams. It has such a lovely and complex flavour, you don’t need anything other than damsons and sugar. Instead of laboriously stoning each damson this recipe uses an easier method. The high pectin content in damsons also means you get a reliable and easy set.
This post may contain affiliate links. As an Amazon Associate, I earn from qualifying purchases. See my cookie and privacy statement for further details.
There’s nothing quite as rewarding as lining up jars of homemade jam, freshly filled and still warm from the pot. Even after many years of preserving, that moment never loses its magic. This recipe takes a little more work than some, but the results are more than worth it.
Dive Right In
- What Are Damsons Anyway?
- Why You’ll Want To Make Damson Jam
- The Best Damson Jam
- How To Make Damson Jam
- How To Remove Damson Stones
- Other Jam Recipes You Might Like
- Keep In Touch
- Pin It
- The Recipe
What Are Damsons Anyway?
Damsons (Prunus insititia) are a type of hardy plum native to Great Britain. They’re dark purple, smaller than most and often grow in the wild. They’re generally ready to harvest in late August and throughout the month of September.

Because of their high acidity, damsons develop an excellent, deep flavour when cooked with sugar, but a mouth puckering effect if eaten raw. They’re also high in tannins, which gives them a slightly astringent edge.
Damsons are a clingstone variety, meaning the stones are firmly attached to the flesh and not easily removed.
All of this makes them far better suited to cooking, where their qualities shine in jams, chutneys, wines and liqueurs.
Why You’ll Want To Make Damson Jam
If you’ve managed to get hold of some damsons or grow your own, this recipe is the perfect way to capture their unique flavour. Here are a few reasons as to why you’ll want to make it:
- Beautiful colour – The jam cooks down to a rich jewel-like purple, making each jar a little bit special.
- Easy set – Damsons are naturally high in pectin, so the jam sets reliably without hassle.
- Just two ingredients – All you need is damsons and sugar, no extras or setting agents.
- No fiddly stoning – You don’t need to stone each damson, you can remove them as the jam cooks.
- Preserves the season – Damson jam is a perfect way to enjoy a fleeting fruit harvest all year round.
- Traditional yet simple – A classic preserve that feels timeless but is straightforward enough for beginners.
- Unbeatable flavour – Damsons have a deep, rich, tart-sweet taste that makes a more complex jam than ordinary plums.
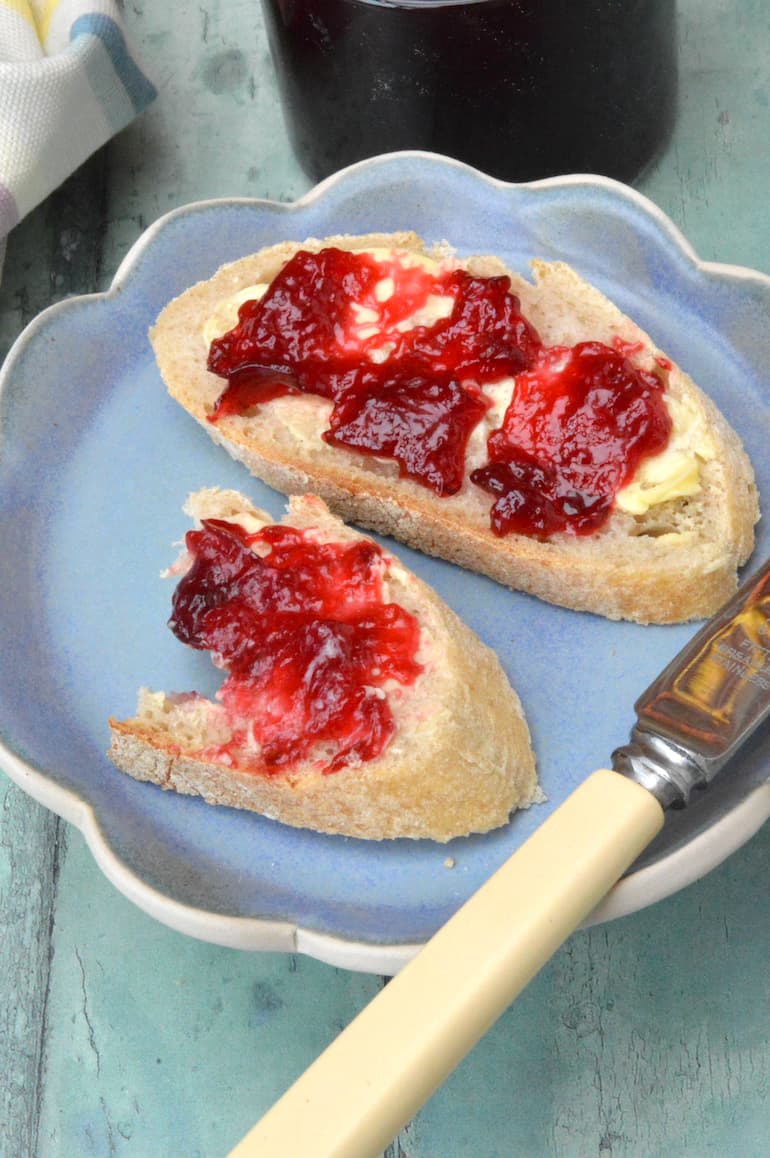
- Versatile to use – Spread on toast, dollop onto porridge, serve with scones and cream or use as a filling for cakes and puddings.
The Best Damson Jam
Plum jam is always a delight, but damson jam is even better. Many, in fact, argue it’s the best jam of all. I’m inclined to agree with them.
You only need two ingredients to make this most delicious tart yet sweet damson jam. Yet it’s a tricky jam to make. Not because it’s difficult to set though. Like all plum jams it sets well and fast. Damsons have plenty of natural pectin.
It’s the stones! Unless you’re happy to make jam with stones included in the final product, there’s no getting away from the fact, there is no easy way to remove them.
I was given a jar of homemade damson jam once and the stones were still in it. The jam was delicious, but I didn’t enjoy worrying about cracking my teeth every time I ate some. So I like to remove them before the jam goes into the jar.
Because damsons are high in pectin, you get a fairly firm jam. It’s hard to achieve a soft set one, if that’s what you like best. But it spreads well and doesn’t run off your toast. For this reason, it’s makes an excellent jam for filling cakes.
I use a bit less sugar than you’ll find in most recipes, but it’s still sweet and delicious. It doesn’t really affect the set either – neither the time nor the consistency.
The best sugar to use for jam making is white granulated sugar. Its large crystals dissolve slower and more evenly which produces a clearer and brighter jam. Preserving sugar is okay, but don’t use jam sugar. This has added pectin which is not only unnecessary, but will likely make your jam rubbery in texture.
How To Make Damson Jam
Set aside a good hour for making damson jam. You don’t want to feel rushed. And you will need to sterilise your jars and equipment before jarring up.
Please refer to the recipe card at the bottom of this post for cooking temperatures and quantities of ingredients used.
Step 1. Preparation
Before you start, it’s a good idea to get on with sterilising your jars, lids and equipment. I have a post on how to sterilise glass jars. Make sure you do the same for your ladle and jam funnel.
Unless you prefer to use a jam thermometer, you’ll also need to place a couple of saucers in the fridge or freezer so that they’re nice and cold when you need them for set testing later.
Step 2. Cook Damsons
Rinse the damsons in cold water, then place into a large stainless steel saucepan – as wide and deep as you have. A preserving pan is ideal, but I don’t have one.
Add the water. Bring the pan gently to the boil, then turn down to a simmer. I cover the pan at this point, but you don’t need to.
Simmer for ten minutes or until the damsons are completely soft. Turn off the heat. Unless you’ve already removed the stones, you’ll need to do that now.
See my section on how to remove damson stones below.
Step 3. Make Jam
Once the stones are removed, pour the sugar into the pan. Leave for a few minutes, then stir until the sugar has dissolved. As the damsons should still be quite warm at this point, it won’t take long.
Place the pan back on the stove top and bring it to a rolling boil. You’ll need a medium-high heat for this. Stir occasionally, just to make sure nothing is sticking to the bottom.
Use a long handled wooden spoon for this so that you don’t get splashed with hot jam. Don’t use a metal spoon as it will get hot very quickly and burn you.
Continue boiling until setting point is reached. Unless you’re using a jam thermometer, you’ll need to test for this after the first ten minutes.
Step 4. Test
Remove one of the saucers from the fridge or freezer. Place a half teaspoon of jam on it and leave it for thirty seconds.
Push your finger up against the jam. If it wrinkles it’s set. If it’s still runny, it’s not. Boil the jam for two more minutes and test again. Repeat until the jam is set.
This is called the wrinkle test and it’s what most home jam makers use.
Step 5. Jar Up
As soon as the jam has set, remove it from the heat. If any scum has formed on the top, scoop it off with a slotted spoon and discard. Likewise remove any stones that you might have missed which have floated to the top. Leave the jam to settle for five minutes, then give it a good stir.
Whilst it’s still hot, use a sterilised ladle to pour it into your warm sterilised jars. This is best done with the aid of a sterilised jam funnel.
Place the sterilised lids on top immediately and screw them tight.
You can cover the tops of the jam with waxed discs before sealing if you like. It’s meant to help protect the jam from spoiling. I tend to do this for chutneys, but not for jam.
Once the jars have cooled, label with the name and date. They should keep in a cool dark place for a year, but are generally at their best when consumed within six months.
Top Tip
I picked up this particular tip from Pam Corbin when I attended her preserving course at River Cottage. If you turn the filled glass jars upside down whilst they’re still hot, you’ll sterilise the lids and also create a better seal.
I don’t really like the messy lids this method creates, but I’ve tried it a couple of times and it seems to work.
How To Remove Damson Stones
Damsons are clingstone plums, which means the flesh clings to the stones (sometimes referred to as pits), which makes them difficult to remove.
You can go about it in two different ways.
- Cut the damsons in half and remove the stones with a sharp knife. They won’t come away cleanly, so you’ll lose some of the flesh. But most importantly, it takes ages.
- Cook the damsons whole, then remove the stones once they break free of the flesh. This method means you don’t have to do anything other than wash the fruit before adding to the pan, but again, you’ll lose some of the flesh when trying to fish the stones out.
Personally, I prefer method two. I find it a lot faster than cutting the stones out by hand. In theory the stones are meant to float to the top, which means you can skim them off with a slotted spoon. In reality, I find only a few do this.
Once the damsons have boiled for ten minutes or so and are cooked, I give them a very vigorous stir to break everything up. I then use my wooden spoon to hunt for stones. It takes a while, but not nearly as long as method one.
As quite a bit of the juice and flesh are removed at the same time, I put the stones in a bowl. I then put the whole lot in a sieve and press out as much as I can back into the jam pan. Thrifty is my second name after all.
Other Jam Recipes You Might Like
- cherry jam
- chocolate blackberry jam
- easy blackcurrant jam (with optional chilli)
- fig, apple & pomegranate jam
- gooseberry jam (with optional elderflower)
- vanilla apricot jam
Keep in Touch
Thank you for visiting Tin and Thyme. If you make this damson jam, I’d love to hear about it in the comments below. Do you have any recommendations or tips for jam making?
Please rate the recipe too. And do tag me @choclette8 on Instagram with your images, I love to see your take on my recipes.
For more delicious and nutritious recipes follow me on Twitter, Facebook, Instagram, Flipboard or Pinterest. And don’t forget to SUBSCRIBE to my weekly newsletter. Or why not join the conversation in our Healthy Vegetarian Whole Food Recipes Facebook Group?
If you’d like more recipes for preserves, follow the link and you’ll find I have quite a lot of them. All delicious and nutritious, of course.
Choclette x
Damson Jam. PIN IT.
Homemade damson jam is a true autumn treat. It’s not difficult to make, is beautiful to look at and full of flavour. Whether you spread it on toast, swirl it into porridge or sandwich a cake with it, each jar is a lovely reminder of the season. It also makes a thoughtful homemade gift, so it’s well worth putting a few jars aside to share.
Damson Jam
Ingredients
- 1.6 kilo damsons (3 ½ ib)
- 350 ml water
- 1.4 kilo granulated sugar (3 lb) can use preserving sugar instead, but NOT jam sugar
Instructions
- Before you start with the jam, place two saucers in the freezer. You'll need these to test for when the jam is set.
- In a large wide stainless steel saucepan, simmer the damsons in the water until soft and broken down. I use a lid for this bit, but you don't need to. It will take 10-15 minutes depending on how firm the damsons are.1.6 kilo damsons, 350 ml water
- Turn the heat off and give the damsons a vigorous stir to loosen any stones that may not have dislodged themselves. Hunt them out with a wooden or slotted spoon and remove to a bowl. This will take a good ten minutes or so, but well worth doing.
- Once you've removed the stones, tip the contents of the bowl into the sieve and press out any collected juices etc back into the jam pan.
- Whilst the plums are cooking, wash your jars and place in the oven to sterilise. For details check this post how to sterilise glass jars and bottles.
- Pour the sugar into the jam pan. Stir until the sugar is completely dissolved.1.4 kilo granulated sugar
- Crank up the heat and bring the damsons to a rolling boil. Boil until setting point is reached. This usually takes between ten and fifteen minutes. Start to test after ten minutes (see Wrinkle Test note below on how to do this). Alternatively you can use a jam thermometer. Setting point is 104-105°C (220°F).
- Remove from the heat. If any scum has formed on the top, scoop it off with a slotted spoon and discard. Likewise remove any stones that might have been missed and have floated to the top. Let rest for five minutes, then stir.
- Using a sterilised ladle and jam funnel, pour into warm sterilised jars. Cap immediately with clean sterilised lids and twist tight.
- Leave to cool then label with the date and name.
Notes
Prep Time
Prep time will very much depend on which method you use to remove the stones. This recipe assumes the method used in it.Wrinkle Test
To test for setting point use the wrinkle test. Remove the pan from the heat after it’s boiled for five minutes. Place half a teaspoon of the jam onto a cold plate. Leave for thirty seconds, then push your finger up against the jam. If it wrinkles it’s set. If it’s still runny, it’s not. Boil the jam for two more minutes and test again. Repeat until the jam is set.Different Quantities
If you have more or less damsons than the amount given in this recipe, adjust the quantities of sugar and water accordingly. It will take more or less time for the jam to set according to how much fruit you use, so just boil until you reach setting point.How Long Will It Last?
Damson jam is at its best in the first six months, but it should last for up to a year if you keep it in a cool dark place. Once you’ve opened the jar, however, it’s best kept in the fridge.You’ll find additional tips and info about this recipe in the main body of the post.Please note: calories and other nutritional information are per serving. They’re approximate and will depend on serving size and exact ingredients used. Please refer to my nutrition disclaimer for further information.Nutrition Estimate
This post contains affiliate links which are marked with an asterisk* or (affiliate link). If you buy through a link, it won’t cost you any more, but I might get a small commission. Thank you for your support of the brands and organisations that help to keep Tin and Thyme blithe and blogging.
I have four damson trees and make this jam often, usually in the winter so I can use the top plate of the wood-burner. I harvest the fruit and then freeze them.
I like to add the juice of a lemon to about 2kgs of fruit. I don’t add as much water, just enough to keep the fruit from sticking. I like the tip about removing the stones before adding the sugar. My granddaughter (11) dotes on this jam.
Oh four damson jams Peter, how wonderful is that! And it’s so good to hear you make jam with it on a regular basis. I do wonder if homemade jam is a dying art. I add lemons to fruit which have low acidity, which also usually equates to low pectin, but damsons are so sour I don’t think it needs it.
Oh! Damson jam, a blast from the past, my mouth is watering. Unfortunately, I have never been able to find Damsons here in the Netherlands! sob, sob.
No, I suspect not Janet. It’s quite hard to find damsons here in the UK unless you either grow them yourself or know someone who does.
If we lived closer Janet I would give you a bag full of them as we have three big damsen trees in the garden. We get about ten shopping bags full each year.
I put several bags in the freezer and when you take them out and thawed they are super juicy!
I think I didn’t take this into consideration when adding the water this time. A loaf is baking in the oven and when it’s time and curt with the jam on I get pushed aside by my wife and she gets stuck in!
How wonderful to have so many damsons. Interesting to hear you need less water if cooking from frozen. There’s always much to learn I find. Your wife has very good taste – obviously!
I was lucky enough to be given some Damsons once and loved the resulting jam. As kids we used to beg our Mum to leave some stones in the jam for us! Kids!!
Thanks for your recipe Choclette. :))
Hahaha, you do make me laugh Mary. I know someone who says sucking the stones she finds in the jam is the best bit. And she’s not a kid.