
Homemade Trifle Sponges (Only 3 Ingredients)
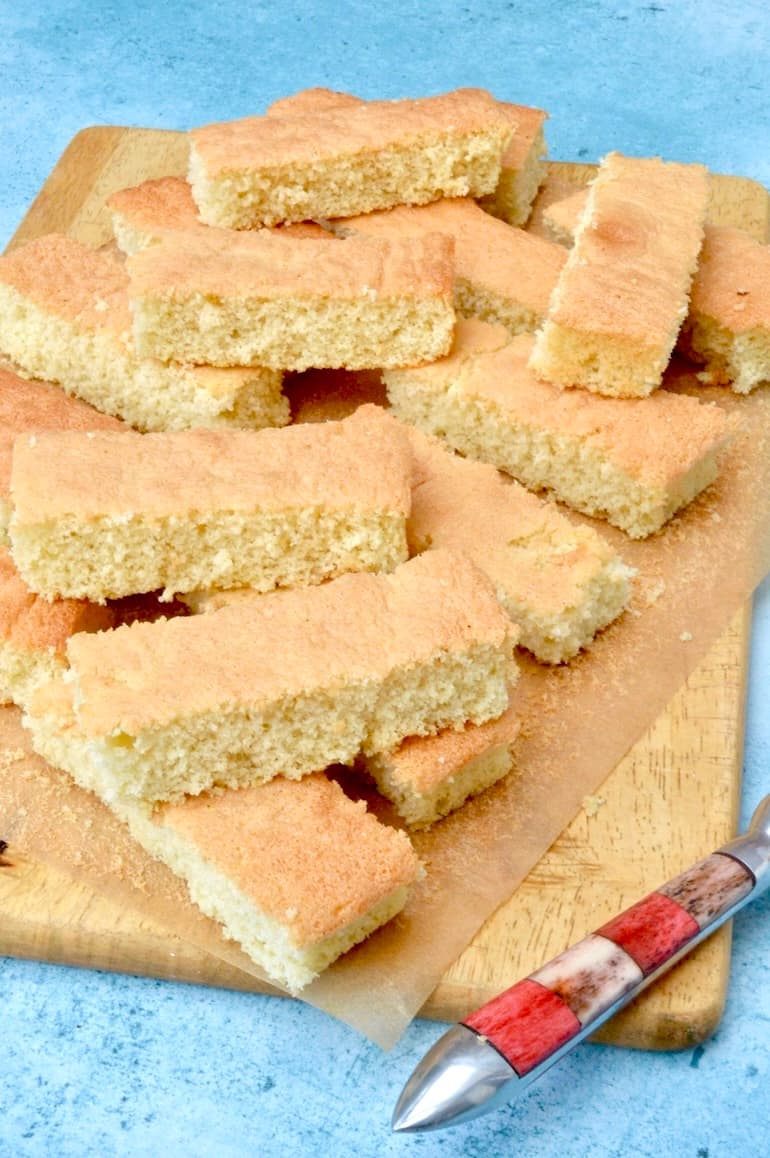
Classic soft, light and bouncy genoise sponge made with just three ingredients. Once baked, cut it into fingers and you have the perfect homemade trifle sponges for soaking up sherry, fruit juice or whatever else you care to throw at them. Quick and easy to make, they’re a simple homemade alternative to bought sponge fingers.
This post may contain affiliate links. As an Amazon Associate, I earn from qualifying purchases. See my cookie and privacy statement for further details.
CT loves a good trifle and so do I come to that. When I make one, as I did for his recent birthday, I always make my own sponge fingers. As an added bonus, they make brilliant, almost instant, desserts. Just spoon some jam or fruit curd over the top, whip up some cream or pour over custard and you’re done.
Dive Right In
- Why This Recipe For Homemade Trifle Sponges Works
- Homemade Wholemeal Trifle Sponges
- Ingredients, Additions And Substitutions
- How To Make Homemade Trifle Sponges
- Top Tips For Making Perfect Sponge Fingers
- Recipes In Which To Use Homemade Trifle Sponges
- Keep In Touch
- Pin It
- The Recipe
Why This Recipe For Homemade Trifle Sponges Works
- Just three ingredients – You only need eggs, sugar and flour to make these light and airy sponge fingers. No butter, oil or raising agents required.
- Wholemeal or gluten-free options – Surprisingly, this simple genoise works beautifully with 100% wholemeal spelt flour as well as gluten-free flour. So you can make light, bouncy trifle sponges without relying on plain white flour.
- Perfect for soaking – The traditional whisked genoise sponge has a wonderfully light, springy texture that’s ideal for absorbing liquid in a trifle whilst retaining enough structure to hold its shape.
- Quick and easy – As long as you have electric beaters or a stand mixer, these trifle sponges are a cinch to make. You don’t even need to separate the eggs.
- Made in one batch – Rather than piping individual sponge fingers, you bake the sponge as a single sheet and cut it into fingers afterwards. Much simpler.
- Sugar control – There’s a noticeable difference between freshly baked sponge and a packet of bought fingers, which can be overly sweet.
- Useful beyond trifle – Once you have the basic sponge, the fingers are also handy for layered desserts and puddings, such as tiramisu, where you need a light cake to soak up liquids.
Homemade Wholemeal Trifle Sponges
When I first made trifle sponges, I used ordinary plain flour as I understood that the lightest touch is needed to keep these sponge fingers light and bouncy. But of course, I eventually had to try them with wholemeal spelt flour. And guess what? It works just as well.

The sponge rises well and is just as light, soft and bouncy as those made with plain flour. The fingers hold up well to liquid and neither fall apart nor become soggy.
They are of course, darker in colour and they also have a chewier texture. But they taste just as good, if not better.
One of the things I really like about these sponge fingers is that you don’t need to add any butter. If you’re making a trifle, there’s plenty of fat in the custard and cream layers. The secret to a good Genoise sponge is whisking lots of air into the mix. This gives it a real lift and gives it that classic spongy texture.
Ingredients, Additions and Substitutions
There are no specialist ingredients required for this recipe. Everything you need is likely to be in your kitchen already. After all we’re talking eggs, sugar and flour and that’s it, unless you’d like to add any extras.
Eggs
The eggs do all of the heavy lifting in this recipe, which means you don’t need any raising agents. Large eggs are the ones to go for, though you can get away with medium eggs at a pinch. Free range eggs, are of course, a must.
Flour
As it’s the eggs that are mostly responsible for the structure of this sponge, it’s absolutely fine to use a standard gluten-free flour mix instead of plain flour. However, a bit more surprisingly, it’s equally fine to use wholemeal spelt flour.
You can also use self-raising flour, if that’s all you have. It will give a slightly different texture, but in the grand scheme of a trifle, you’re probably not going to notice.
Sugar
Caster sugar is the best type of sugar for making a genoise sponge. It dissolves more easily and tends to create a fluffier crumb. I use golden caster sugar as it’s less refined and works a treat.
If you only have granulated sugar, you can still use it, but you’ll need to whisk the eggs and sugar on low speed for longer until the sugar has dissolved.
Additions
If you’re going to soak the sponge fingers in a strongly flavoured liquid, you don’t really need any additional flavouring. But for other purposes, you might like to add the zest of a finely grated lemon, orange or lime. A teaspoon of vanilla extract is another option.
I’ll sometimes use vanilla sugar or cardamom sugar as I usually have jars of both on the go. They make a subtle difference rather than an obvious one.
For chocolate sponge fingers, swap some of the flour for cocoa powder. See my top tips section for quantities.
How To Make Homemade Trifle Sponges
As long as you have electric beaters or a stand mixer, these trifle sponges are a cinch to make. They’re both quick to prepare and bake. Because the sponge is a baked as a relatively thin layer, it cooks fast and cools fast.
Please refer to the recipe card at the bottom of this post for cooking times, measurements and quantities of ingredients used.
Very similar to a Swiss roll sponge, but you want it a bit thicker.
Don’t use your electric mixer to do this and don’t stir or you will lose all those hard earned bubbles you made when whisking.
Step 1. Whisk
This part is the most crucial and the bit that takes the most time. But stick with it because it’s the air bubbles you create that makes a light sponge that rises well and doesn’t sink afterwards.
In a large bowl whisk the eggs and sugar together with electric beaters at low speed until the sugar has dissolved. Or use a stand mixer. Then increase the speed to high and whisk until the mix is thick, pale and has tripled in volume. It should hold its shape when you lift the beaters. It takes between six and nine minutes.
As soon as you’re done, switch the oven on. If you have an oven that’s slow to heat up switch it on before you start.
Step 2. Fold In Flour
Sift in the flour, a third at a time. Then fold it into the egg mixture with a large metal spoon each time, being careful not to knock any air out of the mix.
If you’re using wholemeal spelt flour, tip in any bran that’s left in the sieve and fold that in too.
Step 3. Bake
Line your tin with baking paper so that it goes up the sides as well as along the bottom. The cake will rise as it cooks and will likely stick to the sides of the tin if there’s no paper.
Carefully spoon or scrape the mix into the lined tin, trying not to lose any air as you do so. Level the top if you need to, but do it carefully.
Then bake in the centre of your preheated oven for around fifteen minutes. You’ll know it’s done when it’s lightly browned on top and springy to the touch.
Leave in the tin for a few minutes to cool slightly, then keeping the lining paper in tact, lift it out onto a wire rack to cool completely before slicing.
Once thoroughly cooled, turn the sponge upside down onto a wooden board, then carefully peel away the lining paper.
Using a serrated knife, carefully cut the sponge into halves both lengthways and widthways. Then slice each quarter into four equal sized fingers, giving you sixteen in total.
You can store the trifle sponges in a sealed container for up to three days before using. They also freeze well.
Top Tips For Making Perfect Sponge Fingers
Tin size is approximate – Baking tins vary hugely, so don’t worry too much if your tin isn’t the exact size I’ve mentioned. You’re looking for something which has low sides and measures approximately 30 x 20 cm (12 inch x 8 inch).
Use room temperature eggs – Cold eggs won’t hold as much air and will take longer to whisk.
Beat for at least 6 minutes – The key to this cake is in the whisking. To get a good rise with a springy texture and no eggy taste you need to beat the eggs and sugar for at least 6 minutes in a stand mixer. You’ll need to do it longer if using hand held beaters.
Sift flour – As this sponge is all about lightness, it’s important to sift the flour to ensure there are no lumps.
How to fold in flour – Using a large metal spoon, lift the mix up from the bottom of the bowl and fold it over the top in a figure of eight action. Unlike a wooden spoon, a metal one cuts through the air bubbles rather than bursting them. Keep going until you see no streaks of flour, then stop. You want to keep as much of that air in the mix as possible.
Don’t over bake – If you leave the sponge in the oven too long, it will have a dry crumbly consistency rather than a fluffy spongy one.
To make chocolate trifle sponges – Swap 1 tbsp of the flour for 1½ tbsp cocoa powder.
Tips I’ve Heard Of But Haven’t Tried
To reduce whisking time, use a bain-marie – Beat the eggs and sugar in a large heatproof glass bowl over a pan of simmering water. Whisk to the ribbon stage, then take off the heat and whisk for a further two minutes until cool. The theory is that as the eggs heat up they thicken slightly, which means they’re able to hold more air.
To help the sponge rise – Add 1 tbsp of water after you’ve folded in the flour. This creates steam which theoretically helps with the rise. It also helps prevent the sponges from being dry. Though I have to say, my recipe produces perfect sponges that don’t taste at all dry.
Having said that, I’ve added water to this matcha chocolate roll, which is also a fat-free sponge. And the sponge didn’t fall flat.
Recipes In Which To Use Homemade Trifle Sponges
Once you realise how easy it is to make your own trifle sponges, they’ll be no going back. Use them to make: trifles, tiramisu, icebox puddings and other layered desserts.
I sometimes use them as a quick dessert. I’ll drizzle a little homemade cassis over the top, then serve with a dollop of whipped cream and some fruit curd or something like apple purée. It’s a delicious way to eat a deconstructed trifle and it can look quite good too.
Here are some of my recipes.
- Black forest trifle
- Chocolate tiramisu with summer fruit
- Cranberry Christmas trifle
- Summer berry trifle
Keep in Touch
Thank you for visiting Tin and Thyme. If you make these trifle sponges, I’d love to hear about it in the comments below. Do you have any recommendations or tips for making them?
Please rate the recipe too. And do tag me @choclette8 on Instagram with your images, I really enjoy seeing your take on my recipes.
For more delicious and nutritious recipes follow me on Twitter, Facebook, Instagram, Flipboard or Pinterest. And don’t forget to SUBSCRIBE to my weekly newsletter. Or why not join the conversation in our Healthy Vegetarian Whole Food Recipes Facebook Group?
If you’d like more recipes for useful ingredients, follow the link and you’ll find I have quite a lot of them. All delicious and nutritious, of course.
Choclette x
Homemade Trifle Sponges. PIN IT.
Homemade Trifle Sponges (Only 3 Ingredients)
Equipment
- swiss roll tin (30 x 20 cm 12 x 8 inch) affiliate link approximate size
Ingredients
- 3 large eggs room temperature
- 120 g golden caster sugar
- 100 g plain flour (all purpose flour) or wholemeal spelt flour
Instructions
- Whisk eggs and sugar together with electric beaters at low speed until thoroughly combined. Then increase the speed to high and whisk until the mix is thick, pale and has tripled in volume. It should hold its shape for several seconds when you lift out the beaters. It takes between 7 and 10 minutes.3 large eggs, 120 g golden caster sugar
- Preheat the oven to 180℃ (160℃ fan, 350℉, Gas 4).
- Sift in the flour, a third at a time. Then fold it into the egg mixture with a large metal spoon, being careful not to knock any air out of the mix.100 g plain flour (all purpose flour)
- Spoon or scrape the mix into a lined 20 x 30cm Swiss roll tin – again you want to do this carefully so as not to lose any air. Then bake in the centre of your preheated oven for 14-15 minutes, until lightly browned and springy to the touch.
- Leave in the tin for a few minutes to cool slightly, then keeping the lining paper in tact, lift it out onto a wire rack to cool completely before slicing.
- Turn the sponge upside down onto a wooden board, then peel away the lining paper. Using a serrated knife, slice into 16 equal sized fingers.
Notes
Nutrition Estimate
This post contains affiliate links which are marked with an asterisk* or (affiliate link). If you buy through a link, it won’t cost you any more, but I might get a small commission. Thank you for your support of the brands and organisations that help to keep Tin and Thyme blithe and blogging.